Monday, June 16, 2008

Test Bubbler and Volume Measuring Bottles

I grabbed the water bottles I was saving to make into the test bubbler and volume measuring bottles and started wailing away on them.


The bottle and tools rounded up. Turned out I needed a 3/8" drill bit which wasn't in the fancy Hitachi drill bit set. No problemo, as I have a tool box full of just drill bits.


Now I drilled 2 holes in each cap from the bottom using the wood block as a backing. I drilled into the wood a bit to ensure a clean hole. A punch of some sort would work as well, but I didn't have one on hand.


Measuring the tube for the volume displacement bottle involved pressing the tube through the cap until the tub touched the bottom of the bottle. Then measure about 2 inches above the cap and this is the cutoff for the longer volume displacement tube.


There are four short tubes required for this setup and I cut them about 3-4 inches long, leaving the final length for the test bubbler. The input tube only needs to protrude into the water of the test bubbler a few inches so the length was more than adequate at 1/2 to 2/3 of the way into the bottle.


I then cut two lengths of 3/8" clear vinyl tubing, glued the tubes into the bottle caps and connected everything together.


And here's a schematic of the test bubbler and volume displacement bottles.

Sunday, June 15, 2008

Test Bubbler and Volume Measuring Bottles Parts

The Bubbler is designed to prevent any flashback from reaching the Electrolyzer and the volume measuring bottles will give me some idea of how well a particular design works.

Bubbler and Volume Measuring Bottles Parts List


  • (3) 2 liter or gallon water bottles
  • (1) 2ft of 3/8" OD clear plastic tubing
  • (1) 4ft of 3/8" ID Clear vinyl tubing


This picture shows the vynal tubing and rigid clear tube I intend to use. The black polyvinal tubing and the polyvynal elbow will come in handy when I begin playing with the final bubbler design.

Making the Electrolyzer Containers

Let the FUN begin! I set out to make the Electrolyzer containers from the PVC piping parts. This meant going to Lowe's to buy enough Threaded/Slip adapters and cleanout plugs to accomplish this.

First I measured the wall plates the long way and determined that they are 4-1/2 inches long, then I decided I would add a one inch space at the bottom and 3 inches at the top. This made 8-1/2 inches of pipe. I examined the length of pipe and, it was 24-1/8 inches long. Alrighty then, let's make them a smidgen under 8 inches and call it good.

I then used a sharpie marker and marked 7-15/16" from each end of the pipe and plopped the pipe in my trusty chop saw for cutting.
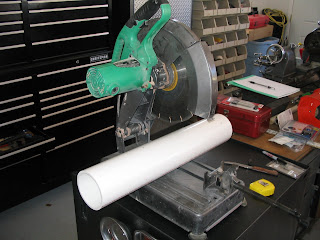

The blade is a 14" Diamond type for cutting concrete and brick, but I've found it cuts just about anything but a large volume of metal.
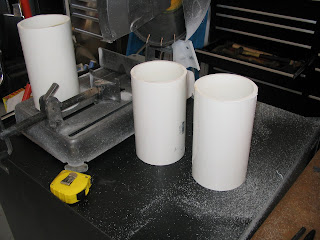

The result was three sections of pipe just about 8 inches long which will do for the purpose of having multiple containers to experiment with.
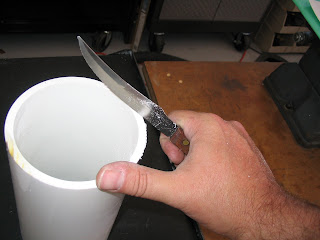

I then scraped the burrs off of the ends of each pipe to prepare them for the gluing operation.
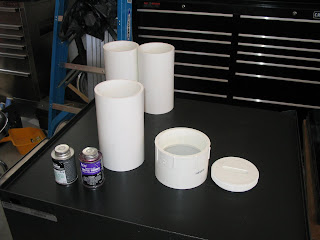

A nice group photo of the pipe, adapter, flush mount cleanout cap, and the primer/solvent cans.
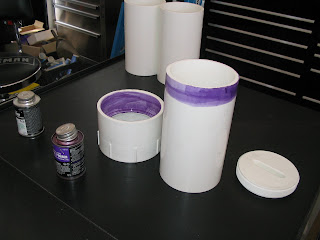

I applied the PVC primer to about an inch of the end of the pipe and the entire inside slip section of the threaded/slip adapter. The primer can has its own swab on a stick inside. I followed the primer with the adhesive. I had to work quickly since the primer softens the plastic in order to bond the parts. This is what it looks like when the parts are ready for assembly.
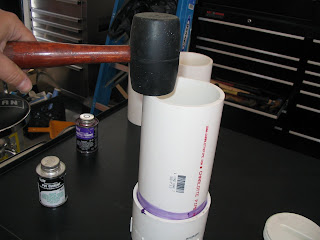

I used a rubber mallet to force the pipe all the way down into the adapter. The picture doesn't show it, but the job had to be finished on the concrete floor.
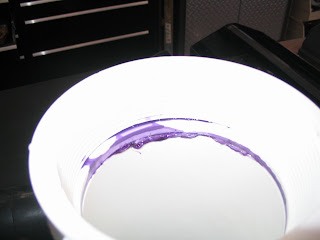

I then inspected the inside of the connection and removed the excess adhesive I found there.
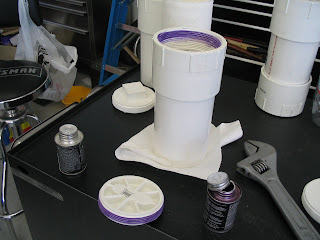

I repeated the gluing procedure for the cleanout cap.
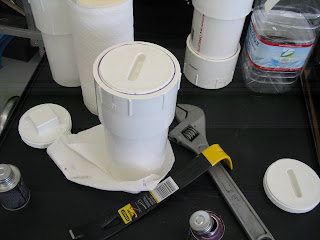

And there the cap is screwed in place. I recommend using a vise and a wreaking bar to turn the cap. I also recommend doing this step as quickly as possible or the plastic cap becomes quite hard to turn.
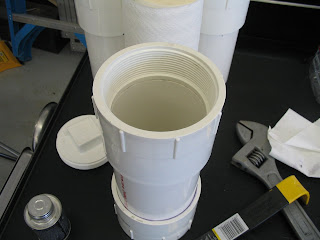

Here is one with the adapter placed on the other end. This particular one is just sitting on the pipe with plumber's Silicone Grease applied as a sealant. By now the bottom of all three containers are finished.
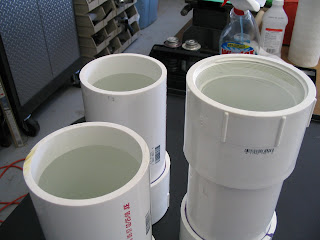

Now to make sure they are usable. I filled each container with water and allowed them to sit to see if there are any leaks.

So why three containers? I wanted to play with the designs a bit, and start out with a plain container, then the second container could have a fluid level tube added and things like that.

Electrolyzer Container Parts

The container itself is pretty simple. That and the parts are reasonable, so I've decided to make more than one container. The first one is as simple as possible, no frills, no bells, no whistles.

Electrolyzer Container Parts List


  • (1) 4"x2' PVC Pipe UPC 11942 19948
  • (2) 4" PVC Slip/Threaded Adapter, UPC 11942 03201
  • (1) 4" PVC Threaded Cleanout Plug Square Head, UPC 11942 03254
  • (1) 4" PVC Flush Cleanout Plug, UPC 11942 03293


The PVC Pipe can be had in 10 foot lengths as well, for the enterprising tinkerer I suppose.

UPDATE: Use SCHED40 220PSI rated PVC Pipe or better for safety!!


Not much to it really, just cut the pipe to length, and glue the bottom together.

Parts Lists Articles


Next:
Previous: Cleaning Supplies

Saturday, June 14, 2008

Cleaning Supplies

I had some stuff on hand already, but still needed a couple of items so there's more than one pic.

Cleaning Supplies List


  • 99% isopropyl alcohol, 1pt, UPC 21130 78053
  • (1) Chemical Resistant Nitrile Gloves, UPC 21130 82034
  • Windex
  • Paper Towels
  • CLR Cleaner, 1 Gal size


Parts Lists Articles


Next: Electrolyzer Container Parts
Previous: Control Panel Parts

Control Panel Parts

Breaking up the shopping lists provides me with an idea of what I bought things for. In this case, the Control Panel parts are lumped together for a nice group photo.

Control panel Parts List


  • (8ft) Primary Wire, 10 Gauge, Black, UPC 37495 85702
  • (1) Battery Isolator Switch, 300Amp, UPC 37495 85988
  • (1) Fuse Block, UPC 37495 85668
  • (1) Digital Clock with Thermometer, UPC 62164 59202
  • (2) 6 Gauge 3/8" Stud Copper Lugs, UPC 08236 79756
  • (1) Universal Fit Hot Shot Performance Ignition System, UPC 47362 84638
  • (1) Ammeter gauge, UPC 21467 07954
  • (1) Vacuum/Boost Gauge, UPC 21467 08203


Now there's an exercise in obscuring what something really is. Imagine this: a "Universal Fit Hot Shot Performance Ignition System" is actually a Piseoelectric Igniter for a gas grill. Nice. Makes me wonder if I need an interpreter for my own language.

Parts Lists Articles


Next: Cleaning Supplies
Previous: What on Earth am I Doing?

Another Shopping Trip

Once again, I went off to the store(s) without so much as a scrap of paper to remind me what on Earth it is I need to buy. At this rate I'll have everything you could ever imagine, but a working Hydroxy generator.

Oh Well.

Safeway


  • Distilled White Vinegar, 1qt
  • Chemical Resistant Nitrile Gloves, UPC 21130 82034
  • 99% Isopropyl Alcohol, 1pt UPC 21130 78053

Advance Auto Parts


  • Fire Extinguisher
  • Boost/Vacuum Gauge, UPC 21467 08203
  • Digital Clock with Thermometer, UPC 62164 59202
  • Primary Wire 10 Gauge, Black, UPC 37495 85702
  • Battery Isolator Switch, 300 Amp, UPC 37495 85988
  • Fuse Block, UPC 37495 85668
  • Brush on Electric Tape, UPC ??


Lowe's


  • Spray Bottle, 1qt
  • Dremel Engraver
  • (2) 6 Gauge 3/8" stud copper lugs, UPC 62164 59202
  • Universal Fit Hot Shot Performance Ignition System (Igniter Replacement), UPC 47362 84638


So disappears another 110 smackers. Ouch! At least this shindig might begin looking like a science project instead of an exercise in tinkering around.

I still don't have the 1/2" clear plastic tube and I may need parts for a fluid level tube, both of which will probably be had at the Ace hardware Store.

Parts & Materials Acquisition Articles


Next:
Previous: A Shopping We Will Go!